Building a DAST Pipeline with Ansible and DefectDojo
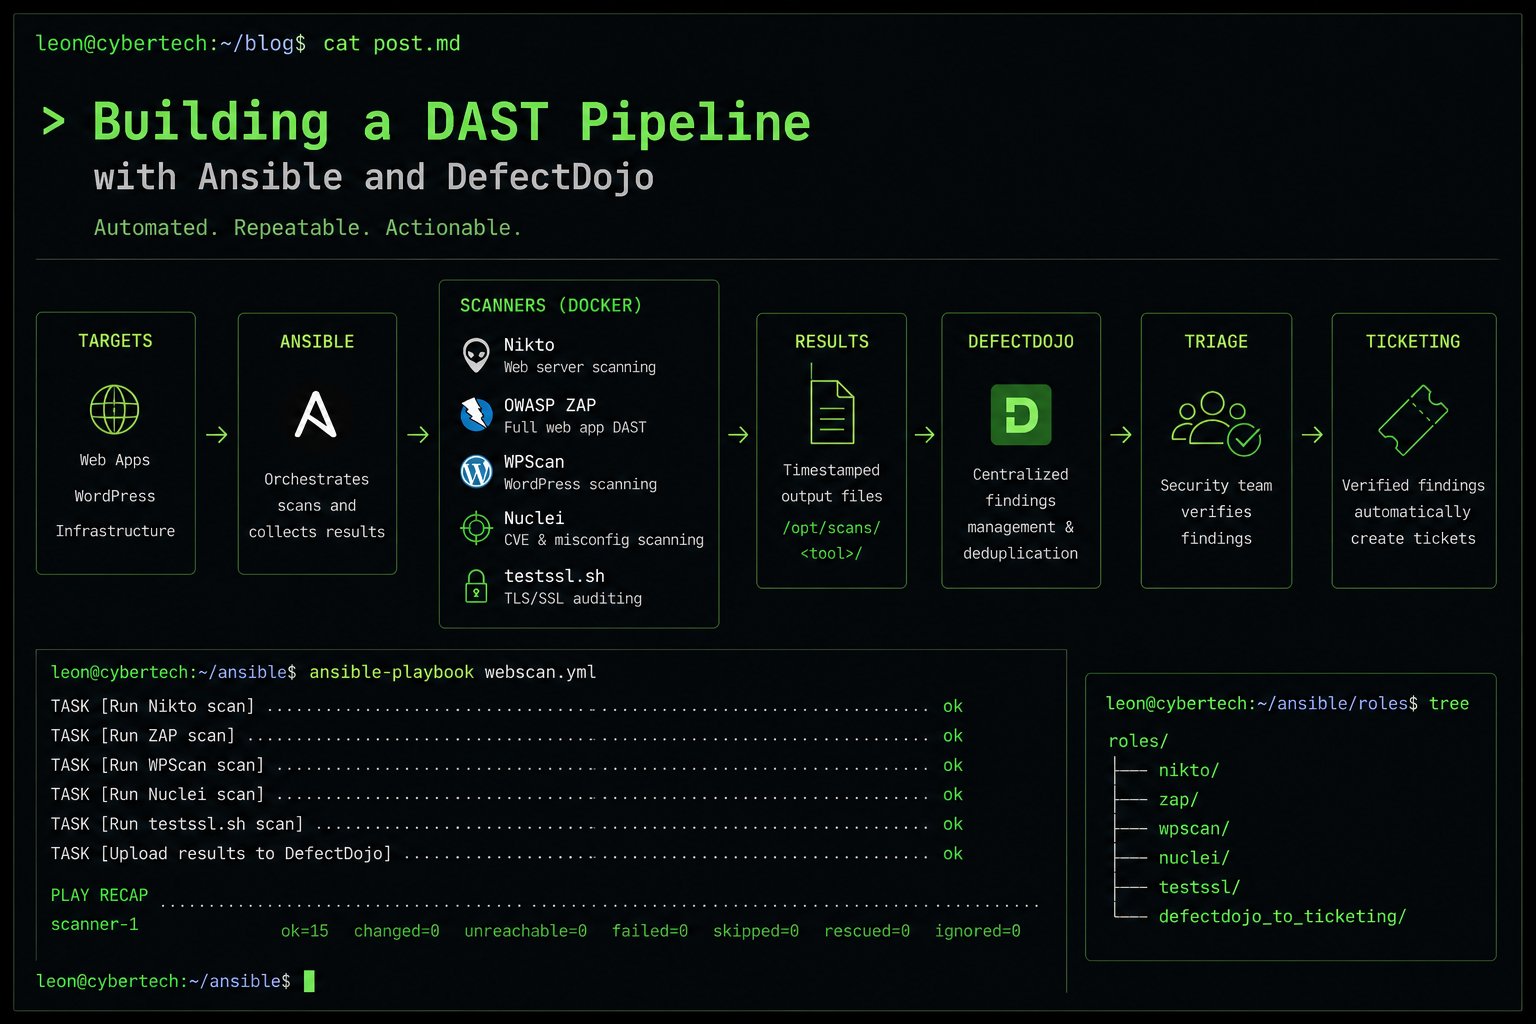
Most infrastructure outgrows its security tooling. New services get added, old ones drift, and before long you're relying on hope and the occasional manual check. This post is about fixing that — building a proper Dynamic Application Security Testing (DAST) pipeline using Ansible, a handful of open source scanners, and DefectDojo as the central findings management platform. Automated, repeatable, and actually actionable.
Background
I'd been looking for a DevSecOps-friendly way to manage vulnerability scanning for a while. I tried Faraday first — it promises a unified workspace for security findings, but in practice I found it buggy and frustrating to work with. Getting data in and out reliably was more effort than it was worth.
Eventually I stopped looking for a single tool that does everything and decided to build the pipeline myself using tools I already trusted. Ansible was the obvious choice for orchestration: idempotent, agentless, and easy to extend. The setup is a dedicated VM running security scanners, with Ansible coordinating the scans, collecting results, and pushing findings into DefectDojo for triage.
The same pipeline serves two purposes: ongoing vulnerability management (scheduled scans against production) and DevSecOps (scans triggered automatically by deployments in CI/CD). One codebase, two use cases.
The Goal
The end result I was aiming for:
- Multiple web scanners running automatically against targets
- All findings centralised in DefectDojo
- Verified findings automatically creating tickets in your ticketing system
- Everything managed as code, repeatable, and extensible
The Stack
| Tool | Purpose |
|---|---|
| Ansible | Orchestration — running scanners, pushing results |
| Nikto | Web server scanning |
| OWASP ZAP | Full web application DAST |
| WPScan | WordPress-specific vulnerability scanning |
| Nuclei | Template-based CVE and misconfiguration scanning |
| testssl.sh | TLS/SSL configuration auditing |
| DefectDojo | Findings management and deduplication |
| Ticketing system | Ticket creation for verified findings |
All scanners run via Docker on a dedicated scanner host, keeping the control node clean.
The Ansible Role Structure
Each scanner follows the same pattern:
roles/<scanner>/
  defaults/main.yml   # variables with sensible defaults
  tasks/main.yml      # install, scan, push to DefectDojo
  tasks/defectdojo_push.yml  # slurp results + POST to DefectDojo API
  meta/main.yml
A few conventions I settled on after some trial and error:
Timestamped output files — every scan run produces a new file so re-runs don't skip due to idempotency checks:
- name: Set scan timestamp
  ansible.builtin.set_fact:
    scan_ts: "{{ lookup('pipe', 'date +%Y%m%d_%H%M%S') }}"
  run_once: true
Slurp + URI for DefectDojo uploads — scan results live on the remote scanner host, not the Ansible controller. Using slurp reads the file remotely and passes it as base64 to the uri module:
- name: Slurp result file
  ansible.builtin.slurp:
    src: "{{ output_file }}"
  become: true
  register: slurped

- name: Upload to DefectDojo
  ansible.builtin.uri:
    url: "{{ defectdojo_url }}/api/v2/import-scan/"
    method: POST
    headers:
      Authorization: "Token {{ defectdojo_api_key }}"
    body_format: form-multipart
    body:
      scan_type: "Nikto Scan"
      engagement: "{{ engagement_id | string }}"
      file:
        content: "{{ slurped.content | b64decode }}"
        filename: "{{ output_file | basename }}"
        mime_type: "application/xml"
include_tasks not import_tasks for conditional blocks — learned this the hard way. import_tasks with a when condition evaluates template variables in loop_control.label even when skipped, causing undefined variable errors. include_tasks skips the whole file cleanly.
Scanner Notes
Nikto
Straightforward. Use -ssl explicitly for HTTPS targets and -Tuning 1234567890abc to enable all check categories. The default scan is surprisingly light.
OWASP ZAP
ZAP runs via Docker. Two gotchas:
- Use
-xfor XML output (not-rwhich generates HTML despite what you might expect) - Add
--user rootto the docker run command — the output directory is root-owned and thezapuser can't write to it
docker run --rm --user root \
  -v /opt/scans/zap:/zap/wrk:rw \
  ghcr.io/zaproxy/zaproxy:stable \
  zap-full-scan.py -t https://target.example.com -x report.xml -I
WPScan
WPScan needs its vulnerability database to be useful. A few lessons:
- The DB lives at
/root/.cache/wpscan/db/inside the container — mount a persistent volume there so you're not re-downloading it every run - Separate the
--updateinto its own task that runs once, then pass--no-updateto the scan task - Full enumeration (
vp,vt,u,tt,cb,dbe) takes 20+ minutes per site. For regular scanning,vp,vt(vulnerable plugins and themes only) is much more practical
- name: Update WPScan DB (once)
  ansible.builtin.command:
    cmd: docker run --rm --user root
      -v /opt/scans/wpscan-db:/root/.cache/wpscan:rw
      wpscanteam/wpscan:latest --update
  timeout: 300

- name: Scan target
  ansible.builtin.command:
    cmd: docker run --rm --user root
      -v /opt/scans/wpscan:/output:rw
      -v /opt/scans/wpscan-db:/root/.cache/wpscan:rw
      wpscanteam/wpscan:latest
      --url https://target.example.com
      --enumerate vp,vt
      --no-update
      --format json
  timeout: 900
Nuclei
Nuclei's template library is massive — CVEs, misconfigs, WordPress-specific checks, nginx, exposed files. Use tags to scope scans:
nuclei_tags: "cve,wordpress,nginx,misconfig"
nuclei_severity: "medium,high,critical"
testssl.sh
The best tool for TLS/SSL auditing. Checks cipher suites, protocol versions, HSTS, certificate validity, OCSP, and more. DefectDojo has a CSV parser for it (Testssl Scan).
DefectDojo Integration
Every scanner role posts results to DefectDojo via the /api/v2/import-scan/ endpoint. A few things to get right:
- All form-multipart values must be strings — pass integers through
| stringfilter or they'll fail with a cryptic type error - Set
verified: falseon import — findings go through a triage step before being actioned - Use
scan_typethat exactly matches DefectDojo's parser name (e.g."Nikto Scan","ZAP Scan","Wpscan")
Ticketing Integration
DefectDojo has a native Jira integration, but it only supports on-premise Jira Server/Data Center. If you're using a cloud-hosted ticketing system (or any tool with a webhook), you can build the bridge yourself with a short Ansible playbook:
- Query DefectDojo API for verified, active findings that haven't been pushed yet
- POST each finding to your ticketing system's incoming webhook
- Tag the finding in DefectDojo so it isn't sent again
- name: Fetch verified findings
ansible.builtin.uri:
url: "{{ defectdojo_url }}/api/v2/findings/?verified=true&active=true¬_tags=ticketing-pushed&limit=100"
headers:
Authorization: "Token {{ defectdojo_api_key }}"
register: dd_findings
- name: Post to ticketing webhook
ansible.builtin.uri:
url: "{{ ticketing_webhook_url }}"
method: POST
headers:
Authorization: "{{ ticketing_webhook_token }}"
body_format: json
body:
title: "[{{ item.severity }}] {{ item.title }}"
severity: "{{ item.severity }}"
defectdojo_url: "{{ defectdojo_url }}/finding/{{ item.id }}"
loop: "{{ dd_findings.json.results }}"
- name: Tag as pushed
ansible.builtin.uri:
url: "{{ defectdojo_url }}/api/v2/findings/{{ item.item.id }}/"
method: PATCH
headers:
Authorization: "Token {{ defectdojo_api_key }}"
body_format: json
body:
tags: "{{ item.item.tags + ['ticketing-pushed'] }}"
loop: "{{ webhook_results.results }}"
The tag acts as a simple idempotency guard — re-running the playbook won't create duplicate tickets. On the receiving end, your ticketing automation rule maps the webhook payload fields to issue fields and creates the ticket.
This pattern works with any system that exposes an incoming webhook: Jira Cloud (Automation), ServiceNow, PagerDuty, Linear, or even a custom endpoint.
The Full Flow
Ansible playbook triggered (manually or CI/CD)
    ↓
Scanner runs against target (Docker on scanner-1)
    ↓
Result file written to /opt/scans/<tool>/
    ↓
Slurped and POSTed to DefectDojo
    ↓
Security team triages findings in DefectDojo
    ↓
Finding marked Verified
    ↓
defectdojo_to_ticketing.yml runs (scheduled every 30 min)
    ↓
Ticket created → finding tagged ticketing-pushed
What's Next
- Wire the scanning playbooks into CI/CD so scans trigger automatically after deployments
- Build a combined webscan playbook that runs all scanners against a target list in one go
- Run WPScan across the full site inventory
- Add nuclei and testssl to the regular rotation